Not too long ago, a friend of mine asked me to make her an earwarmer/headband. Of course, the picture she found was of a knitted headband. I figured I’d be able to find a similar crocheted version, but after scouring Pinterest and Ravelry, I realized that I was out of luck. There were a couple patterns for crocheted cabled headbands, but they looked nothing like what she wanted. I started watching tutorials on how to crochet cables and studied the patterns that were out there, and came up with this! My first pattern.
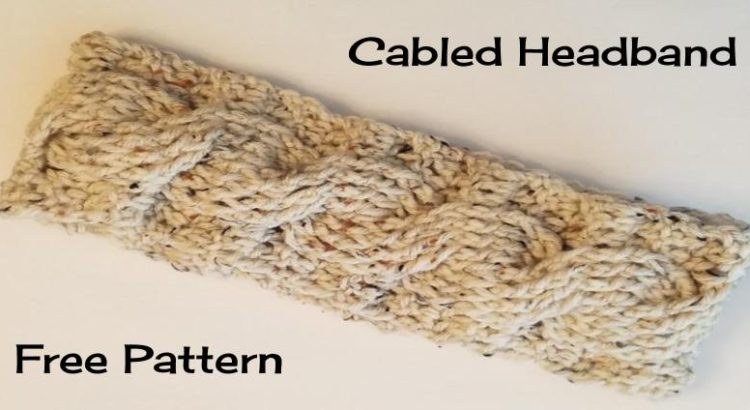
Cabled Headband
Materials:
- I/9 5.5MM Hook
- Worsted Weight Yarn (I used Red Heart Super Saver Aran Fleck)
- Tapestry Needle
Stitches/Abbreviations:
- CH: Chain
- DC: Double Crochet
- BPDC: Back Post Double Crochet
- FPDC: Front Post Double Crochet
- FPTC: Front Post Triple Crochet
Pattern:
Chain 16
Row 1: DC in the 2nd chain from hook and DC across the chain (14 stitches)
Row 2: Chain 2 (counts as first stitch, so it looks like you’re skipping the first stitch), DC in the next two stitches, BPDC in the next 8 stitches, DC in the next 3 stitches. The last stitch will be in the top of the turning chain.
Row 3: Ch 2, DC in the next 2 stitches, Skip four stitches, FPTC around the next four stitches. Go back and FPTC around the skipped four stitches. DC in the last three stitches
Row 4: Ch 2, DC in the next 2 stitches, BPDC around the next 8 stitches, DC in the last three stitches.
*** Rows 3 & 4 can get tricky. This is the tutorial from The Crochet Crowd that I used to help me figure it out!
Row 5: Ch 2, DC in the next 2 stitches, FPDC around the next 8 stitches, DC in the last three stitches.
Row 6: Ch 2, DC in the next 2 stitches, BPDC around the next 8 stitches, DC in the last three stitches.
Repeat rows 3 – 6 until your headband is the desired length. Mine are usually a total of ten cables. I find that the seam looks less noticeable if you end after row 5.
Whip stitch the ends together being careful to match up each stitch, so the seam isn’t too noticeable. (Whip Stitch Seam Tutorial from New Stitch A Day)
Let me know if you see any problems with this pattern. It’s the first I’ve posted!
Click HERE for a printable version!
Feel free to sell what you make from this pattern. All I ask is that if you post anything online, give me some credit/love with a link to the pattern/blog post!
Am excited to crochet this pattern
Thank you! Let me know how it goes. It’s the first pattern I’ve written and I’d love feedback.
Hi!!!! I’ve made 2..works up easy and quick. The only thing that I’ve found.. Is after I chain my 16..I’m going in the 3rd CH. from the hook😊
Could just be me..but it’s working for me.. Lol
You’ve done a phenomenal job for your first pattern. I enjoyed!!
I’ve been playing around with this because I’ve never been happy with how it starts out. You’re right about the math being off with the foundation chain and first row. I think it works even better if you start from the 4th CH, crochet 13DC, and then count the CH3 as the first DC to get 14. I think I started making them the way you suggested and then completely forgot to make the adjustment! Thank you for pointing this out.
Worked up quick! Was super easy to follow instructions. My only suggestion is to use a solid colour to show the texture better.
Thank you for your comment!
Maybe the picture doesn’t do it justice, but I’ve always loved the way the headband turns out using the Aran Fleck yarn. Otherwise, I agree that solid colors work better. I’ve never tried making one with multi-colored yarn, but I can imagine that the texture would be completely lost.
Hola! Soy Noelia de Argentina! Me encantó tu patrón. Estoy terminando el primero. Quería pedirte permiso para transcribirlo al español así lo entiendan las personas que no saben inglés o no saben usar el traductor. Obviamente dándote el crédito por el patrón original. Muchas gracias por compartirlo!
Gracias! Me encantaría que tradujeras el patrón al español! Cuando haya terminado, hágame saber dónde lo ha publicado, así puedo agregarlo al patrón!
This was so fun to make and the pattern was very easy to follow. Thanks!!
Thank you so much! I’m glad you had success!
Hi.
I don’t usually leave notes like this, but seeing as you said you are new to posting patterns, I wanted to give you my feedback. First off, this is a great little pattern. Once I figured out the ‘crossing’ rows, I was off to the races (and now have lots of pattern expansion ideas….). Two hopefully helpful points. Most patterns have a size gauge/swatch listed at the start of the pattern. This would help me know how my tension/yarn/hook setup compares to yours and what the size of my finished product will be. Mostly helpful here to know if I am making it child width, adult width, etc. Second, the starting chain on a double crochet row is usually ch 3 (not chain 2). I found it to be pulling in a little bit tight at the start of every row. Once I made this little adjustment, everything sat just a bit flatter. Any adjustments or corrections you make (like the change in the base row mentioned in the comments above) should be noted in the pattern as either a **correction/corrected version**.
Again, good job on the pattern. I really enjoyed it. Just wanted to share some helpful hints, do with it what you want. I look forward to more creative patterns like this. Thanks!
Thank you for the feedback. I appreciate it. For some reason when I chain three with double crochet, it gaps. I’ve always found that odd since I tend to crochet tightly. I can make a note about that and mention that it’s more common to chain three. I’ll see what I can do about sizing and the gauge. I remember thinking that it might not matter as much with a pattern like this since you can end it when you feel it’s long enough, but if you think it would help, I can figure it out and add it. Since it’s so cold, I’ll probably be making more of these!
Thank you!
Is this written in US terms?
Yes. It is written in US terms.